Question coding: autocoding approach (Windows only)
Autocoding approach (Windows versions only)
Question coding manually is incredibly repetitive and therefore well suited to automation.
Once again, you must ensure transcripts are appropriately formatted to take advantage of autocoding features.
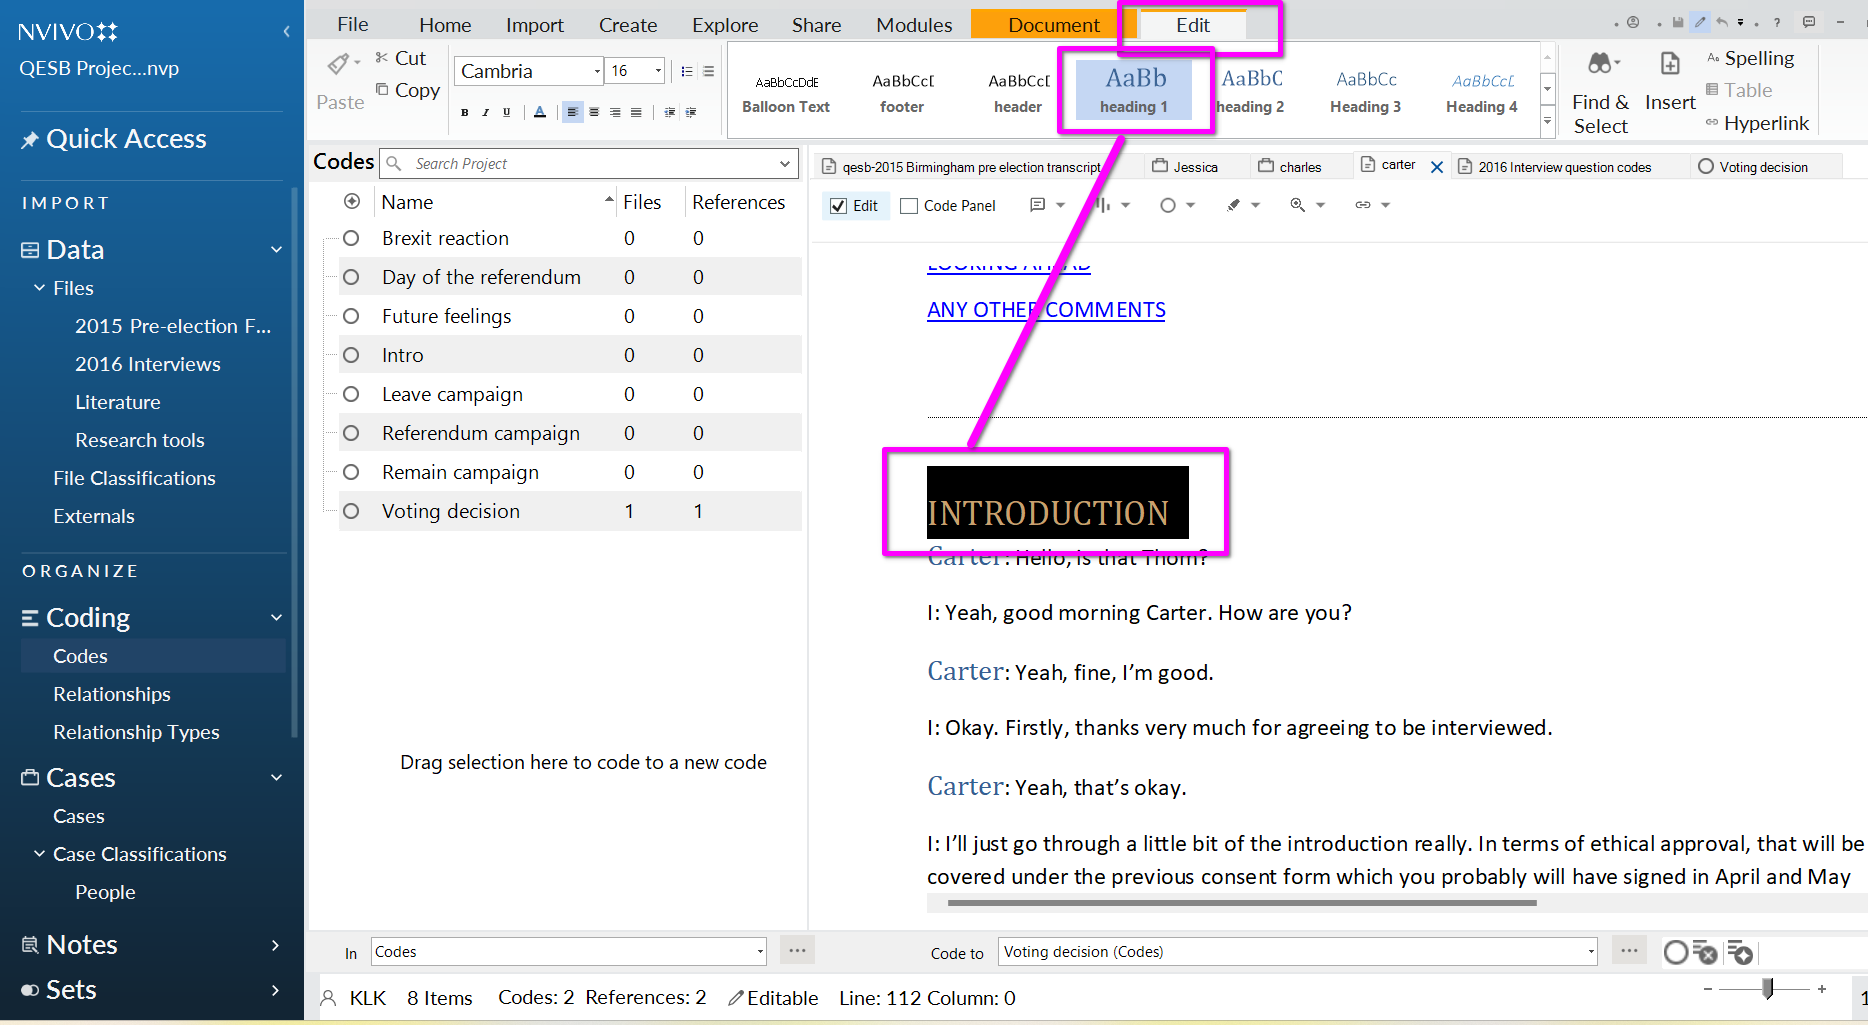
- First, ensure that all of the question headers (e.g. ‘Leave Campaign” ’Voting Decision’ etc ) are formatted in MS Word using the same style (e.g. heading 1’). Check this by opening up a transcript, go to ‘edit’, find a question heading and checking how it’s formatted. Here you can see the headings are formatted as ‘heading 1’:
You are best to do this before uploading the documents to NVivo, although it is possible to do this formatting within NVivo.
We are going to autocode all interview transcripts at once.
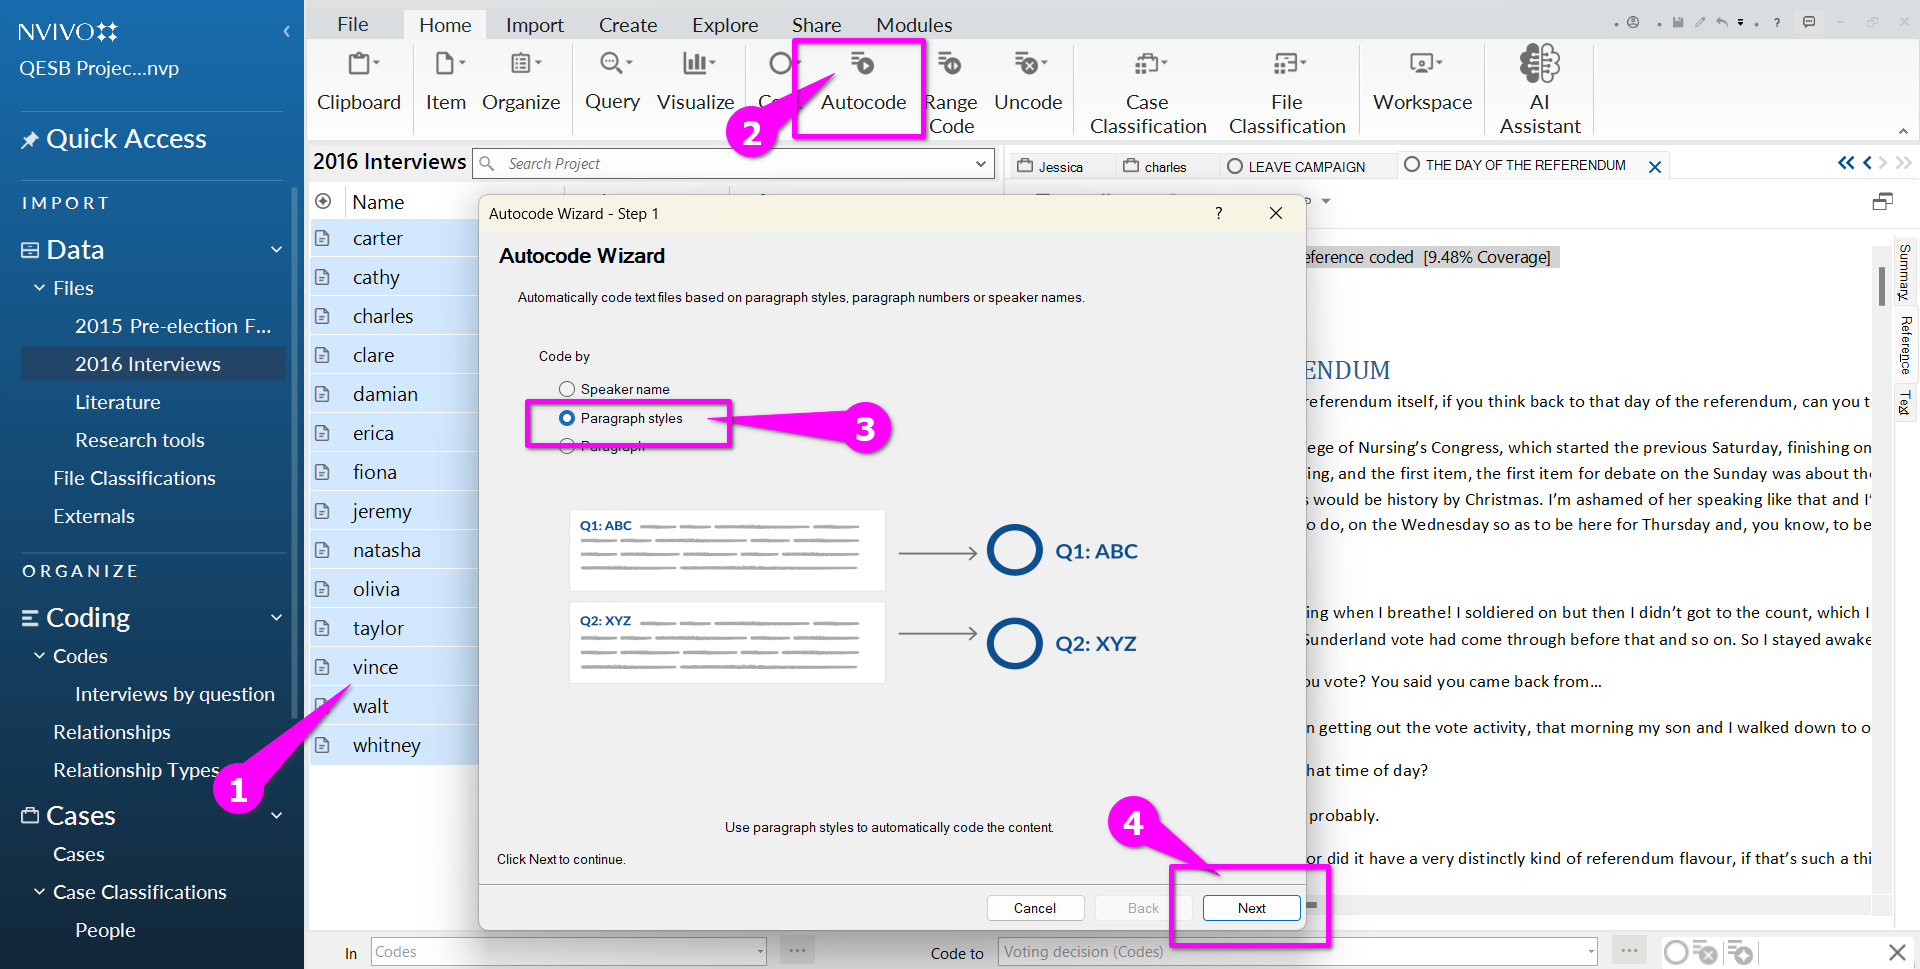
- go into the folder ‘2016 Interviews’ select all (Ctrl+A) (1)
- then click autocode (2)
- On the autocode wizard box, select ‘paragraph styles’ (3)
- Click next (4)
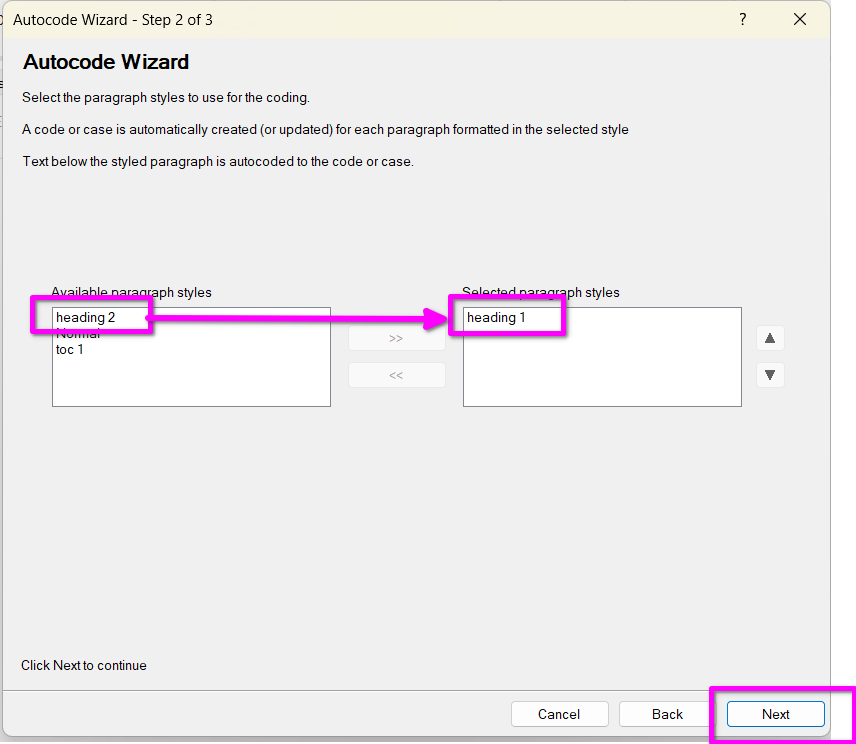
- On step 2 of the autocode wizard, you will see the possible paragraph styles. Select ‘heading 1’ and click ‘next’
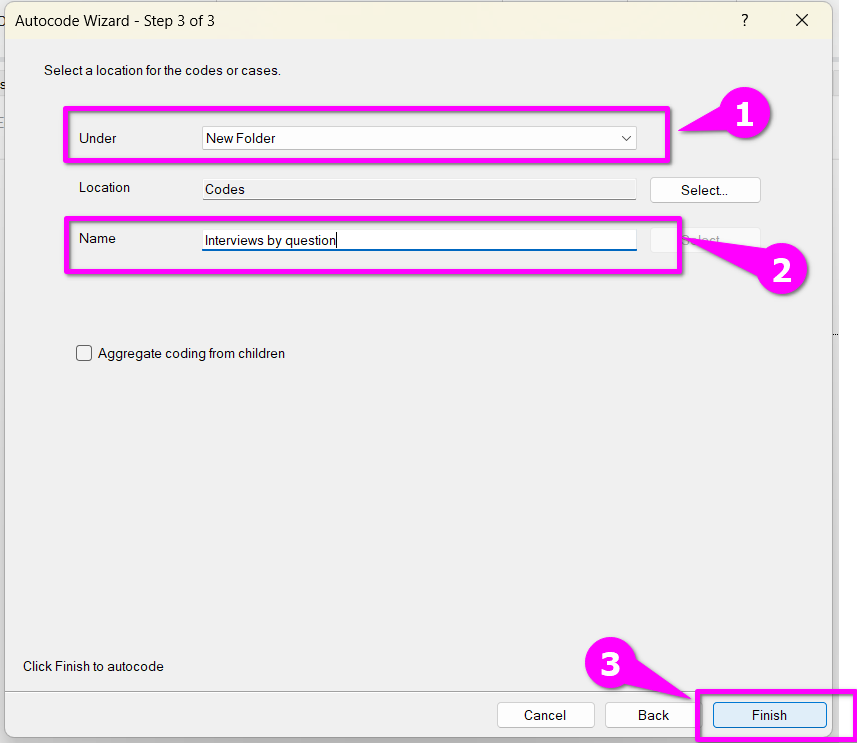
- On step 3 of the wizard, you are asked to choose where to store the codes.
- Here we choose to create a new folder (2)and call this ‘Interviews by question’(2)
- Click finish (3).
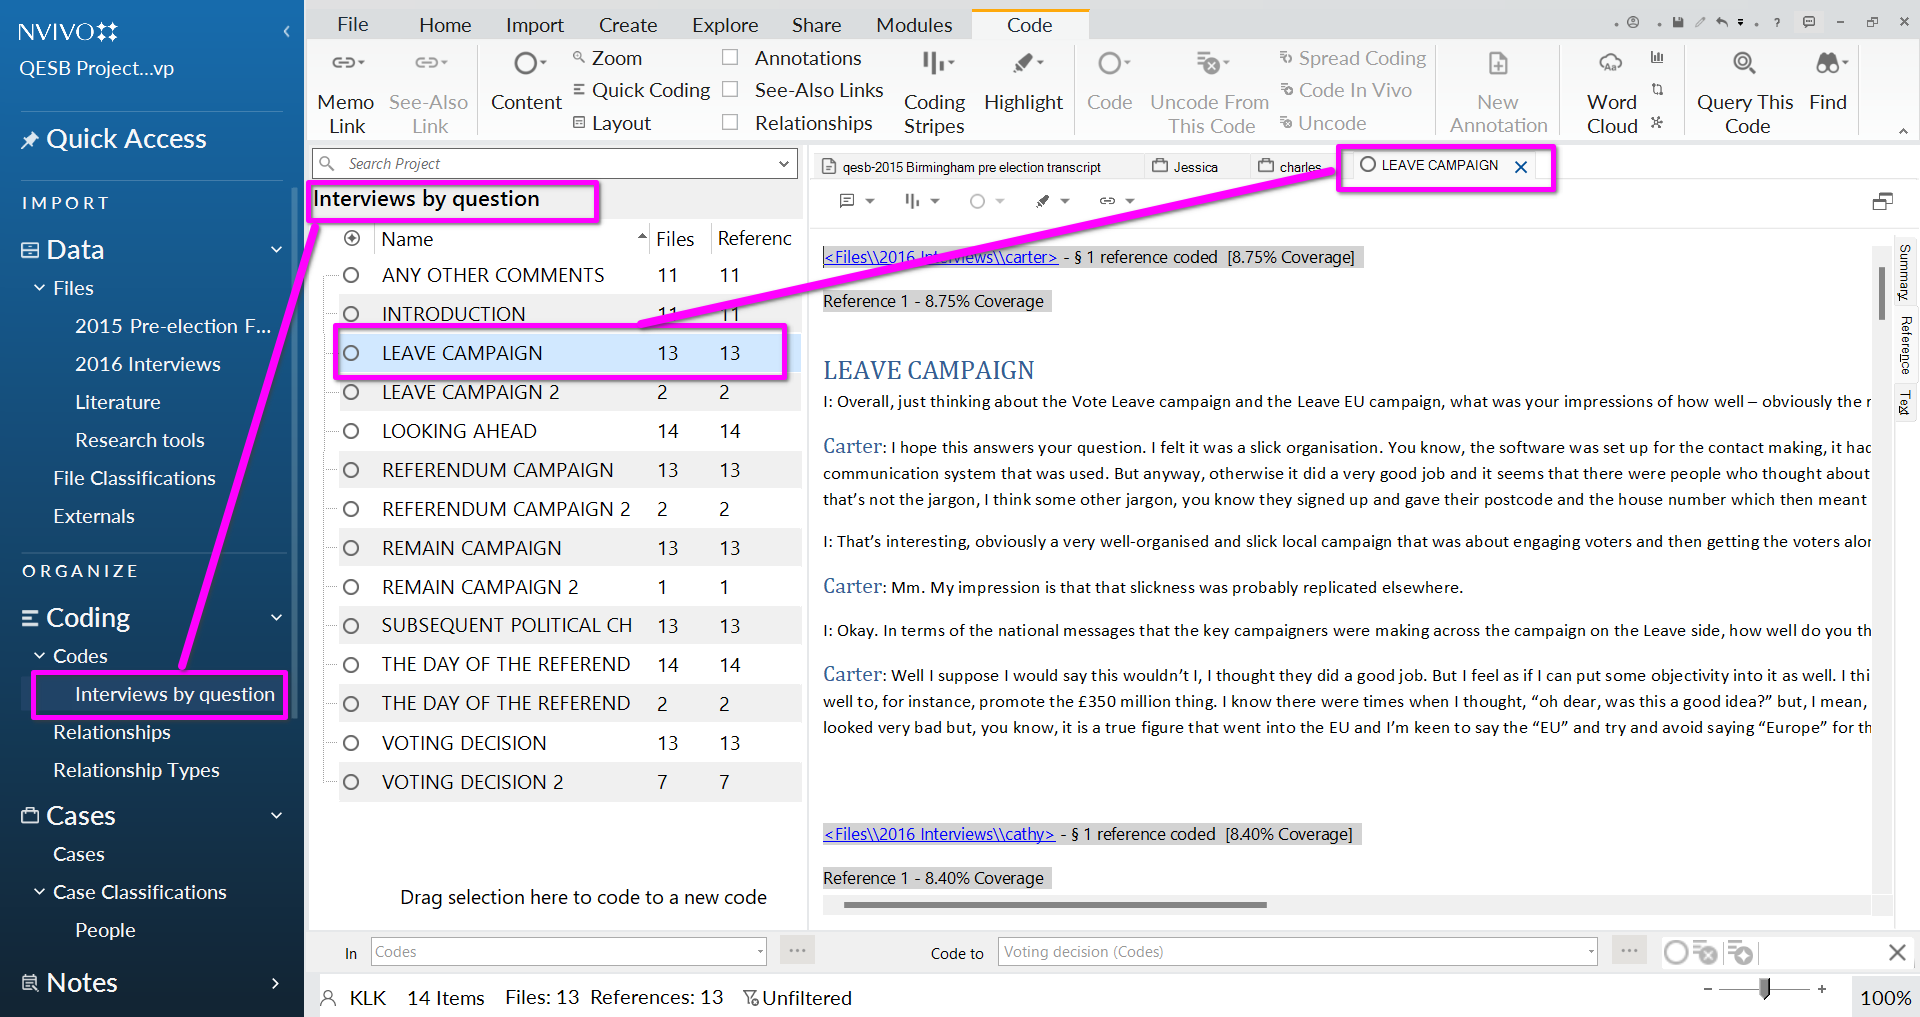
- See the results of the autocoding by clicking into the folder ‘Interviews by question’ that you have just created.
- You can view the text that is coded to any code e.g. ‘Leave Campaign’ by double clicking it. On the right hand side you can see excerpts from across different transcripts coded to this code.
Tidying up autocoding: merging codes
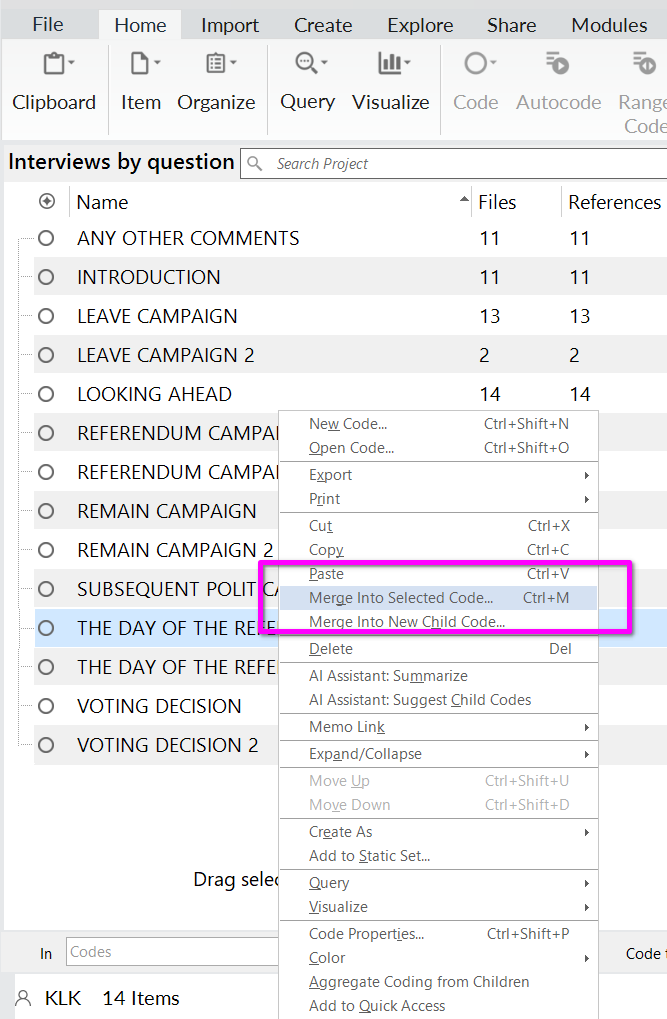
Some codes are very similar e.g. ‘THE DAY OF THE REFERENDUM’ and ‘THE DAY OF THE REFERENDUM 2’ - let’s merge these.
- First, highlight one of them e.g. ‘THE DAY OF THE REFERENDUM 2’ and right click ->copy.

- Then click on the other one i.e. ‘THE DAY OF THE REFERENDUM’, right click, then choose ‘Merge into selected code’ .
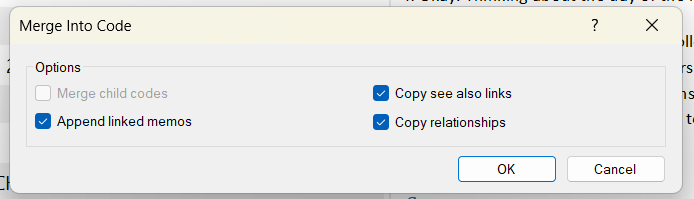
- On the pop up box, you have the chance to change the settings about what you merge, we just stick with the default:
You will notice that the number of codes for ‘THE DAY OF THE REFERENDUM’ had increased.
You can delete the one you just copied ‘’THE DAY OF THE REFERENDUM 2’.
Extra video tutorials about autocoding
After the class, you may find these additional video tutorials useful: